projects
computer stand and shelves

I made the design for these in 5 minutes after trying to see if I had enough wood to make
a design for a new standing shelf I made prior. I didn't, so I made this right after
thinking it up. It cost me, personally, nothing, because it was scraps we already had
from pallets and other projects. The center posts are 1.5 x 3.5" pallet wood, the planks
are .75" x 3.5", and the crossmembers are .75" x 1.5". I wasn't keeping track of how much
of anything I used on it.
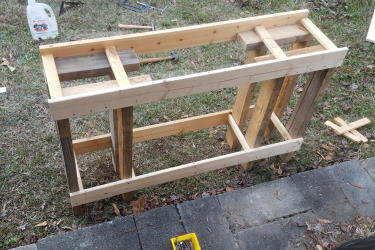
My first step was creating the front and back of the frame. This wasn't fast because I
nailed everything together by hand, and mid-way through the process, I realized I cut the
vertical posts too short due to a measurement error, so I nailed the post-material to the
tops of the frames. I had to use large nails and I tried decking screws as well, but only
one went in without turning into a non-straight shape, and the head on that one is chewed
up very badly.
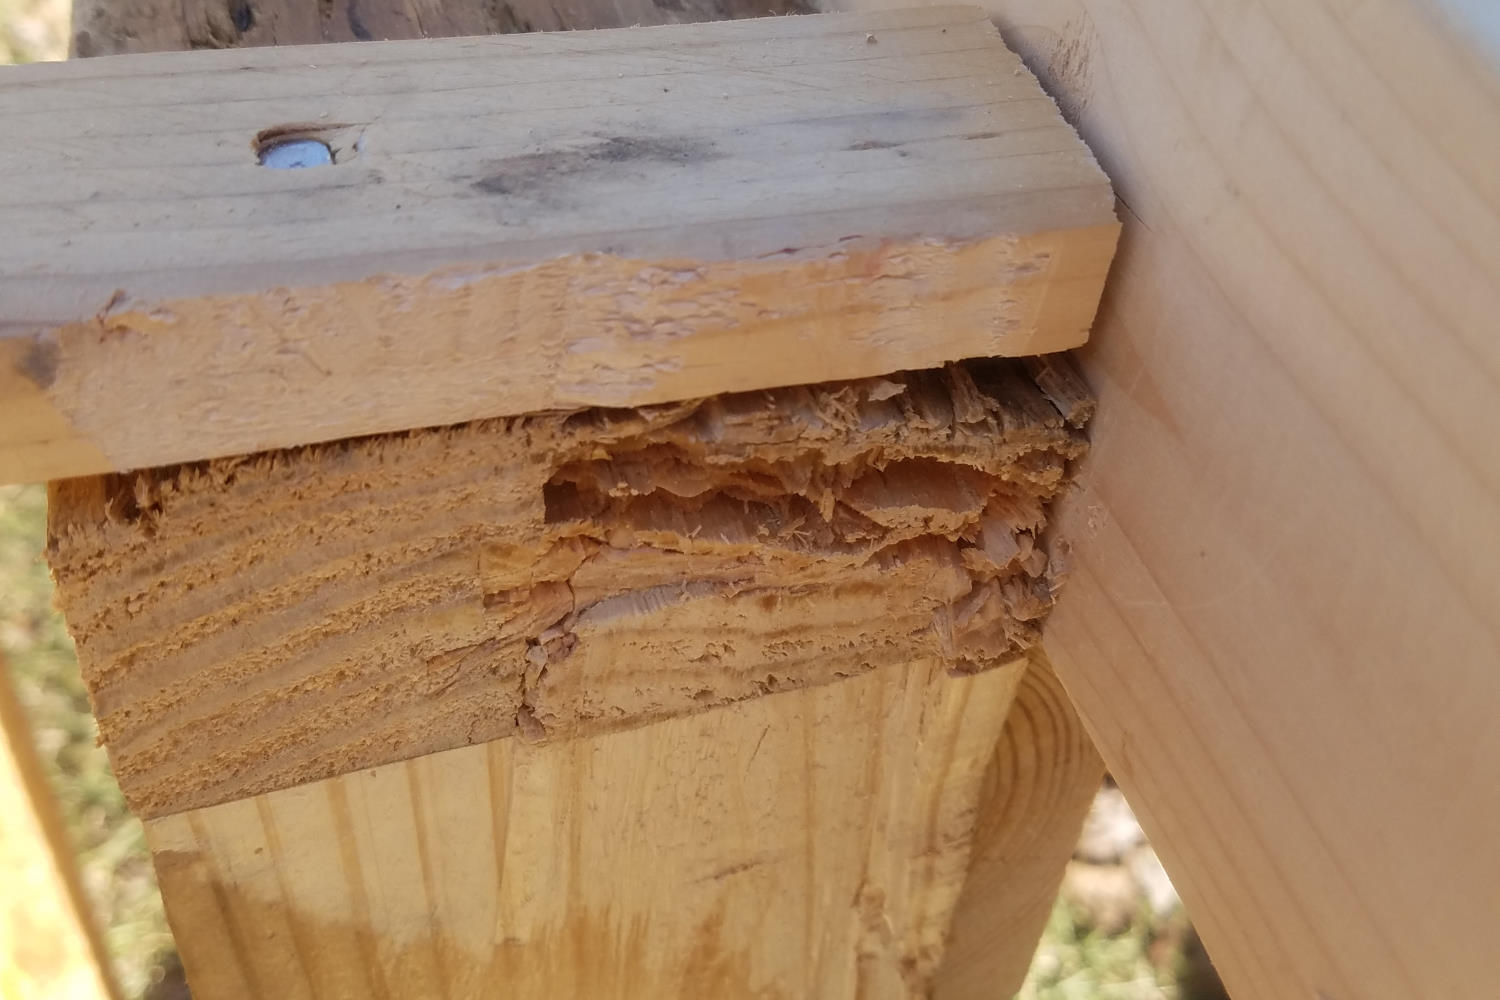
Next was to attach the front and back frame together with the crossmembers. This went fine
on the top but I realized a glaring design issue; the space between the shelf parts was
not enough to swing a hammer with much force, so I had to drive the nails in at an angle,
and even then I didn't have much space to work. I drove many nails into a crossmember only
for it to bend instead of going into the post. Eventually I got it to a point where I
didn't think it would fall apart, but it was still ugly. After this step is what the first
image portrays.
An interim step was cutting the post-material on top of the frames to size because I
was afraid it would interfer with my monitor. In the end, it didn't, and I wasted a lot of
time figuring out how to get a power tool in there and whether or not a hand tool of some
type would work better. I forgot we had one of those small saws with the in-line handle so
I tried to use my hacksaw which is dull and took a long time, though it worked quite well.
After that I tried to use the reciprocating saw, but it wouldn't fit enough to get a full
cut. I decided, then, to try and use a chisel to assist in making the hacksaw work go
faster, and after trying to chisel off a section which wasn't thin enough to be cut
easily, I ended up with the third image, where the grain wanted to bend rather than be
cut. It looks really bad but it should be fine, since I drove the nails on the nicer
looking half of the post. As you can imagine, this took way too long and now that it's
done I realize I didn't even need to do any of that.
The third step was getting the planks for the shelves in, where I ran into the issue of
not having crossmembers across to the ones in the shelf area, and still had very little
space to work in. Again, many bent nails. The issue persisted with putting the planks in.
Also, the space where the middle plank goes was too thin, something I didn't account for,
so I had to resaw the planks. I used a straight edge clamped to the boards and the
reciprocating saw to rough the width and then spent too long with a belt sander getting it
to actually fit.
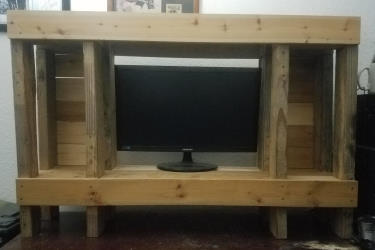
The process of making this thing was a comedy of errors, but I have much more knowledge
about what I'd do to make a better one now. In spite of that, it's a solid piece and I
have no worry about its strength to hold whatever I can fit on it. It beats the hell out
of the little metal stand it was on before, and now the screen is at the proper height
so I won't get Gamer Neck. Higher shelves are awaiting my decision on how high they should
be and how I'm going to mount them.
converting rust on guns


DISCLAIMER: I am not a gunsmith. I pretty much just copied
what a real gunsmith does, and even he says not to attempt it. I took a risk
doing this without proper training, experience, and tools, but I calculated the risk
and decided that I could do it.
This is an Iver Johnson .32 revovler. It was handed down to the sister of a family
friend and I decided that I'd like to try my hand at converting the rust on it.
It really didn't have that much rust on it, but there was(and still is) pitting on
the barrel, and there was some places where the finish had been stripped.
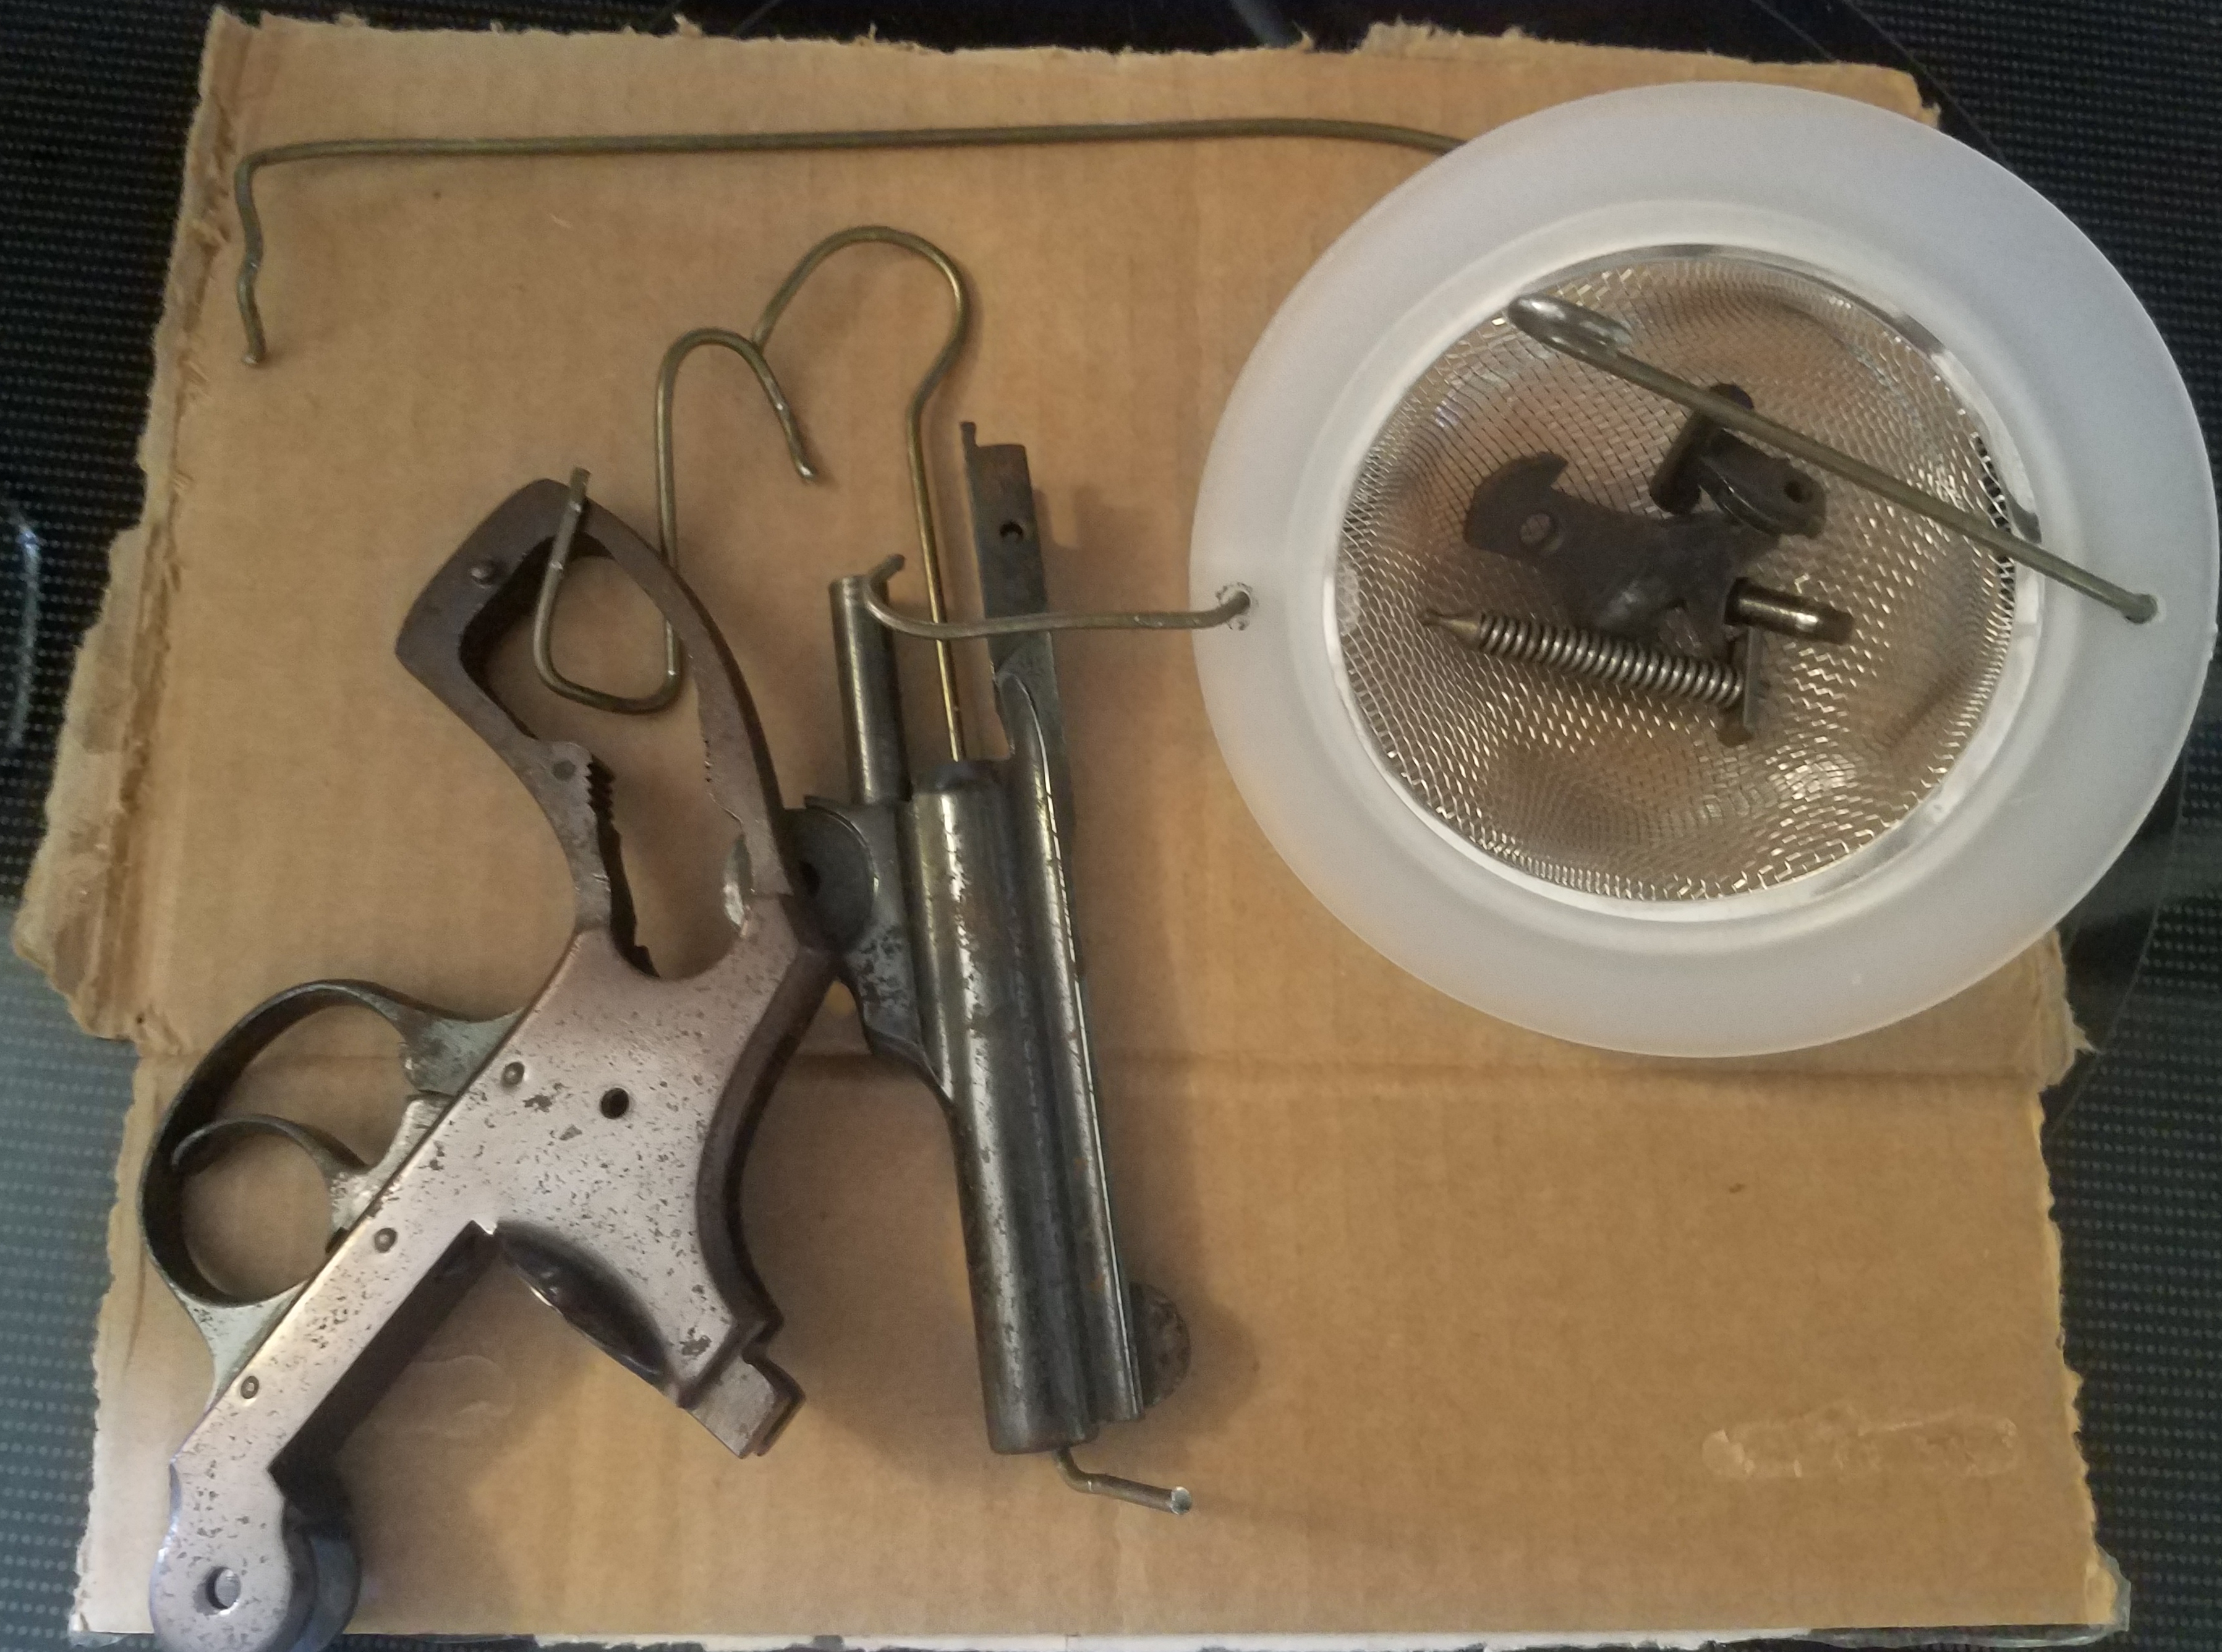
The method for converting rust is very simple. We got a steel pot from Walmart for
8 dollars, a wire coat hanger that was bent into hooks and a rod for holding them
up, a drain trap to hold the small parts, and a bottle of cold bluing solution. What
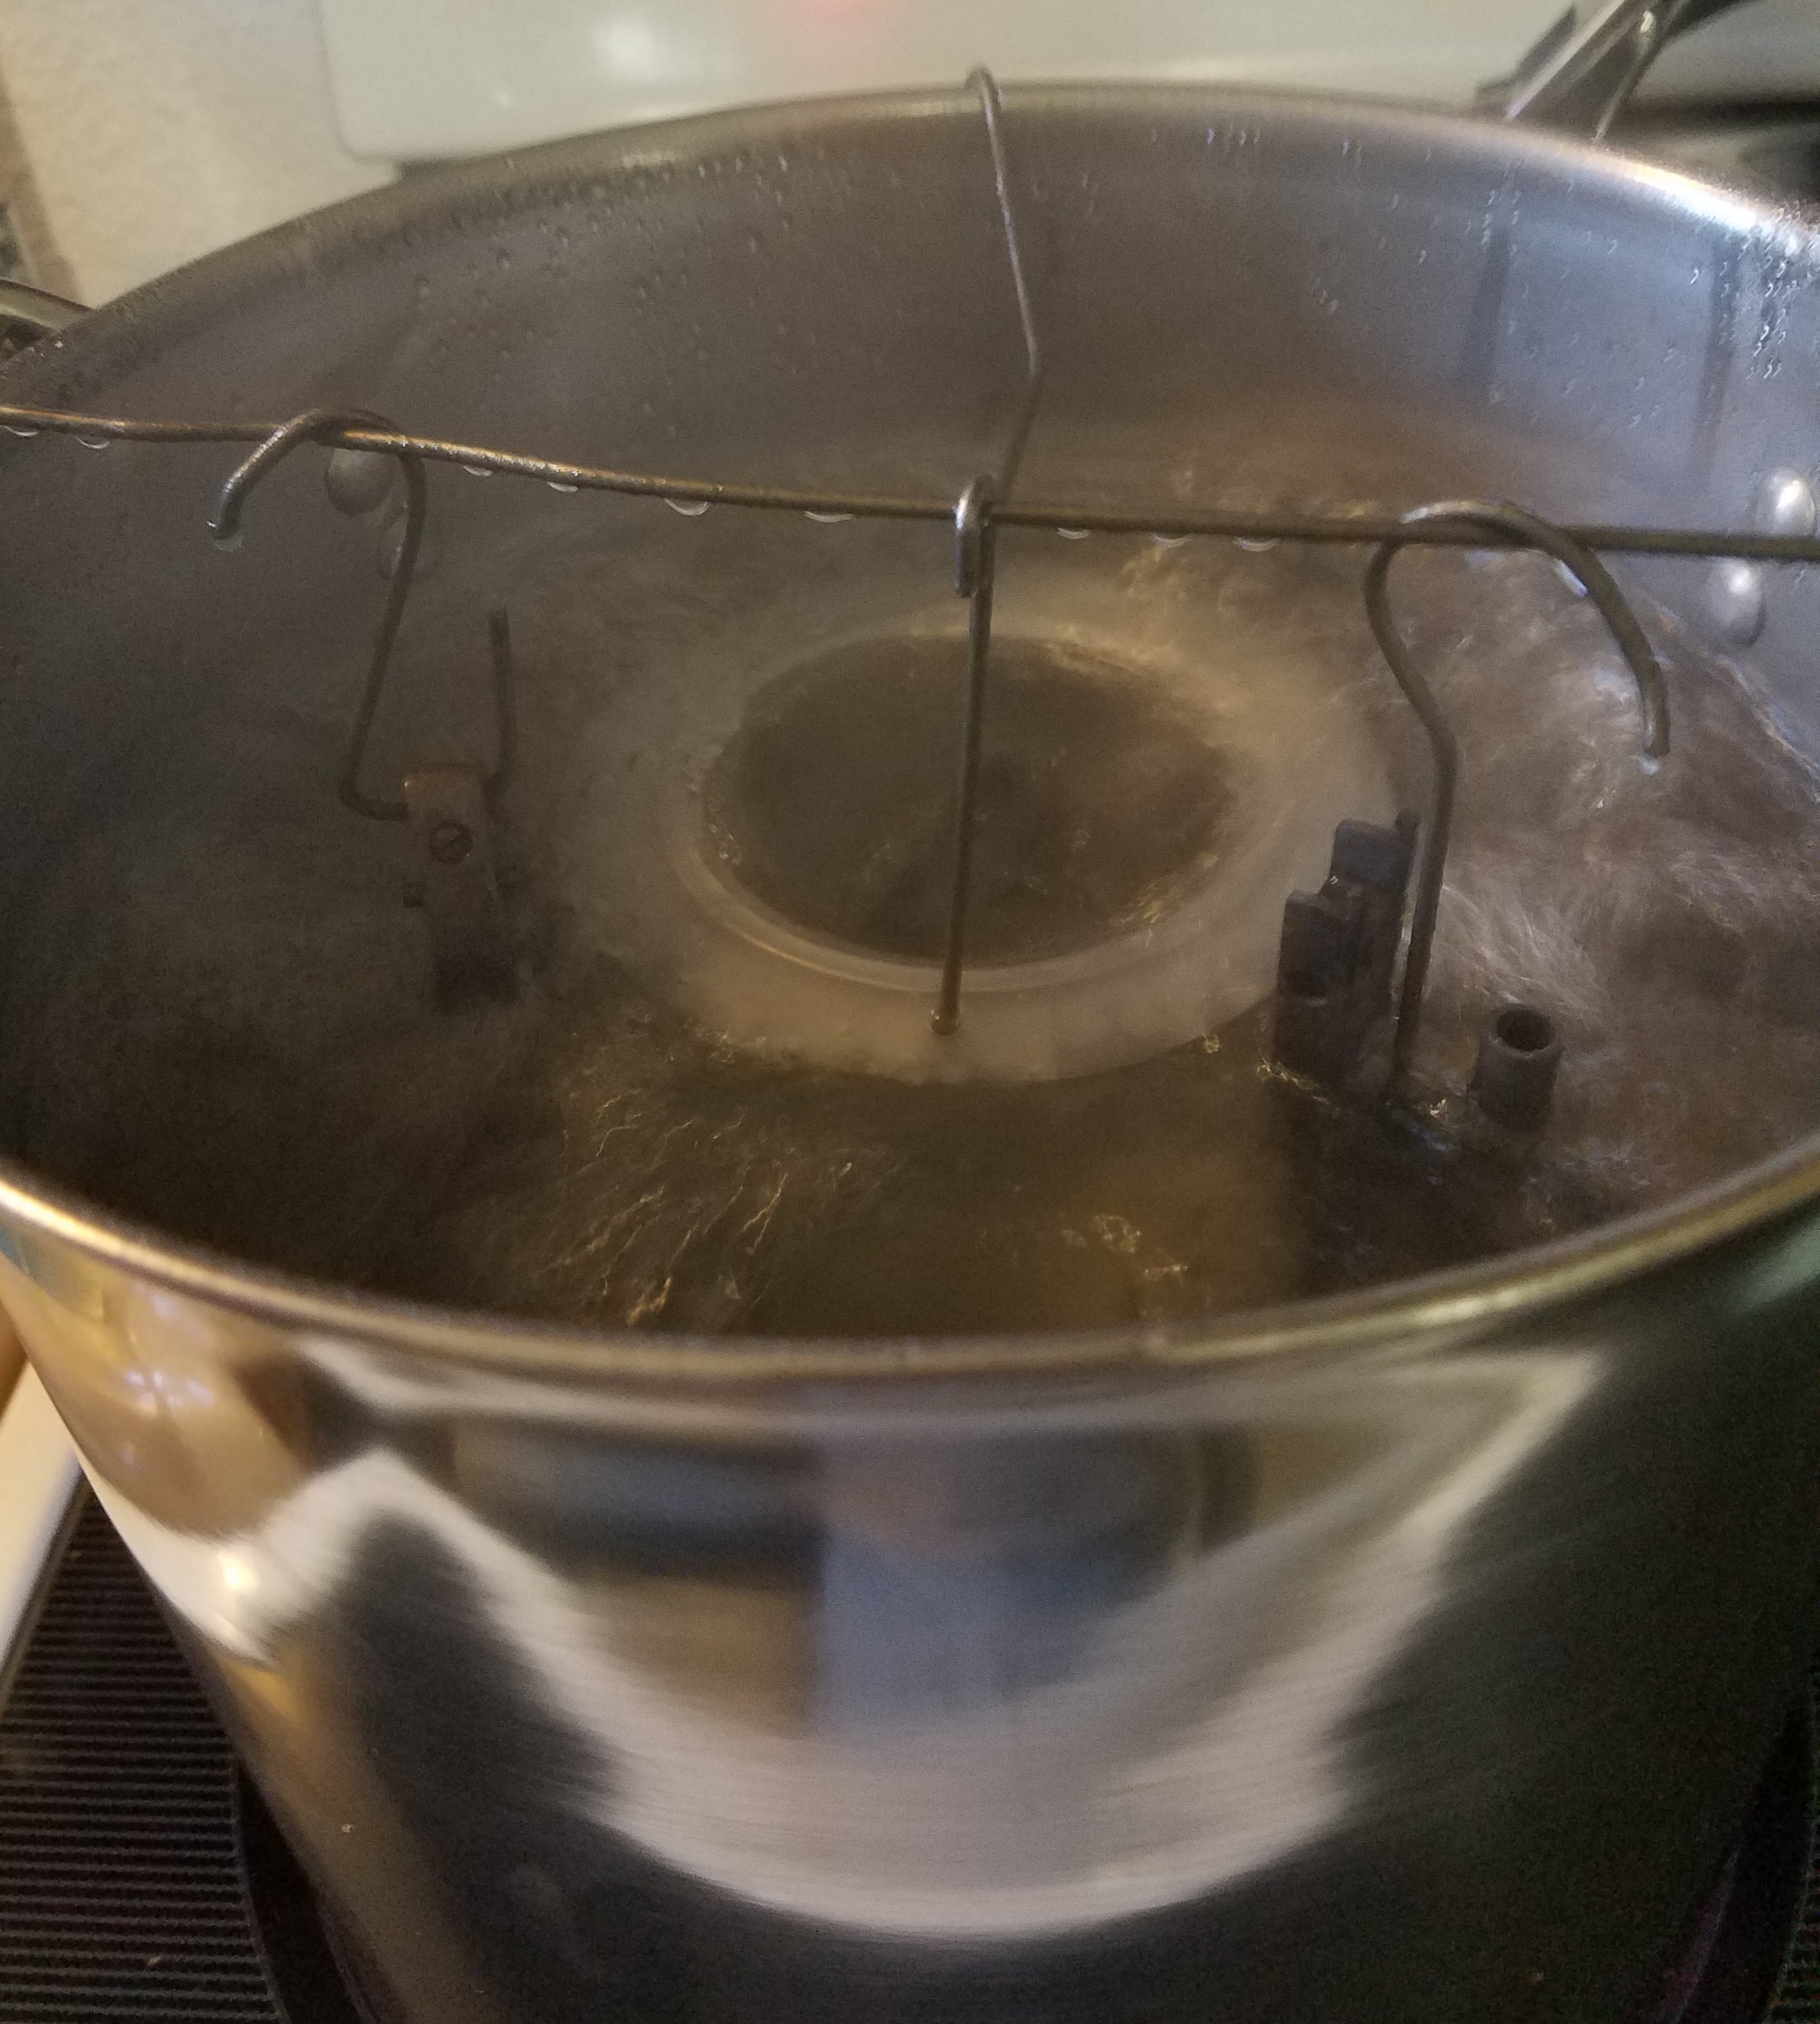
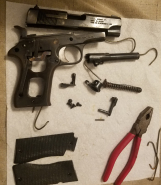
you do is disassemble the firearm, hang it in a pot of water, and keep the water at
a rolling boil for about 40 minutes, adding water if necessary. Then, you take the
parts out, card them(with fine steel wool or a carding wheel on a motor/drill), and
when you've done that however many times you deem necessary, you soak it in kerosene
overnight.
If you wanted to take this a step further, you could rust blue the sections where the
finish has been rubbed off. That would involve a rust blue solution and a steaming
chamber(which can simply consist of a clothes steamer and a cardboard box), but I
decided to just use cold blue solution.
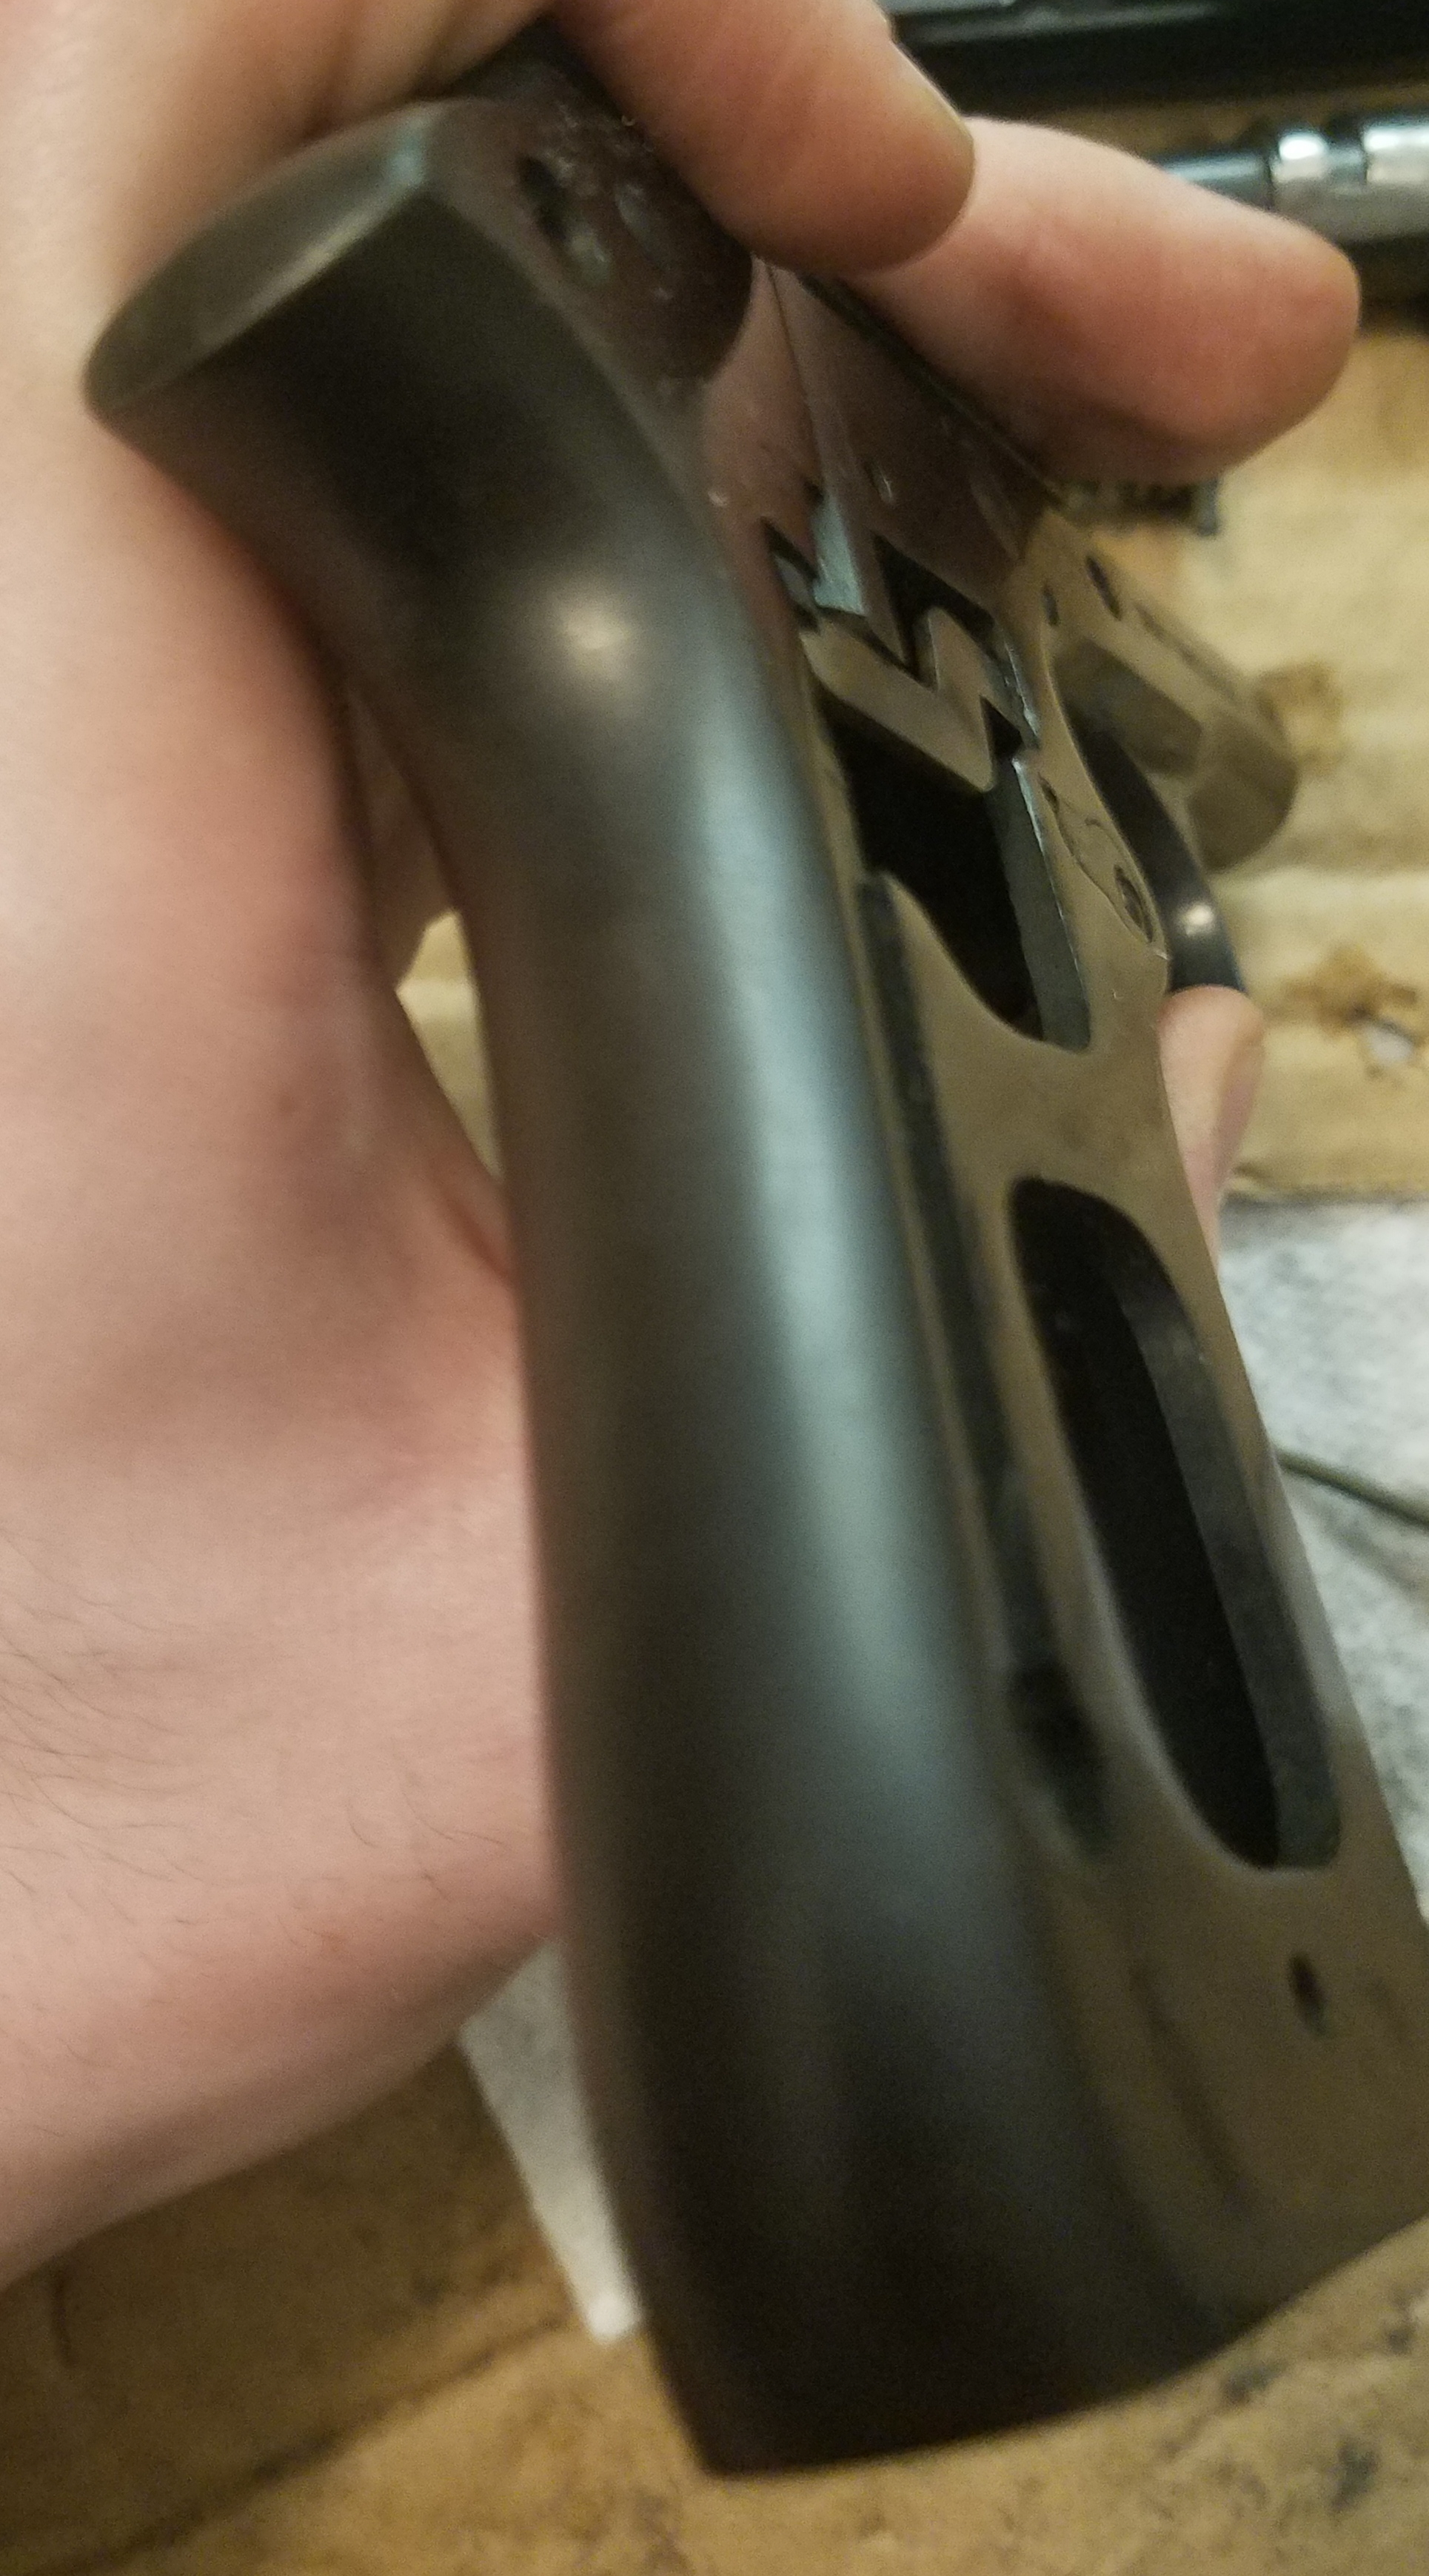
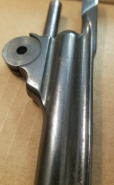
If you look at the 3rd picture, you'll see some pitting that the rust caused.
Pitting is literally where rust has eaten into the metal, and it's impossible to
completely revert. It's unfortunate, but unnoticable from a reasonable distance.
Also, we gave the cylinder to a gunsmith, because it was missing the ejector star.
Update: the gunsmith did not have a star that fit. Because these were made pretty
cheap, the parts are hand-fit. Bummer.

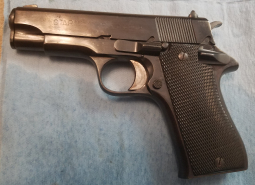

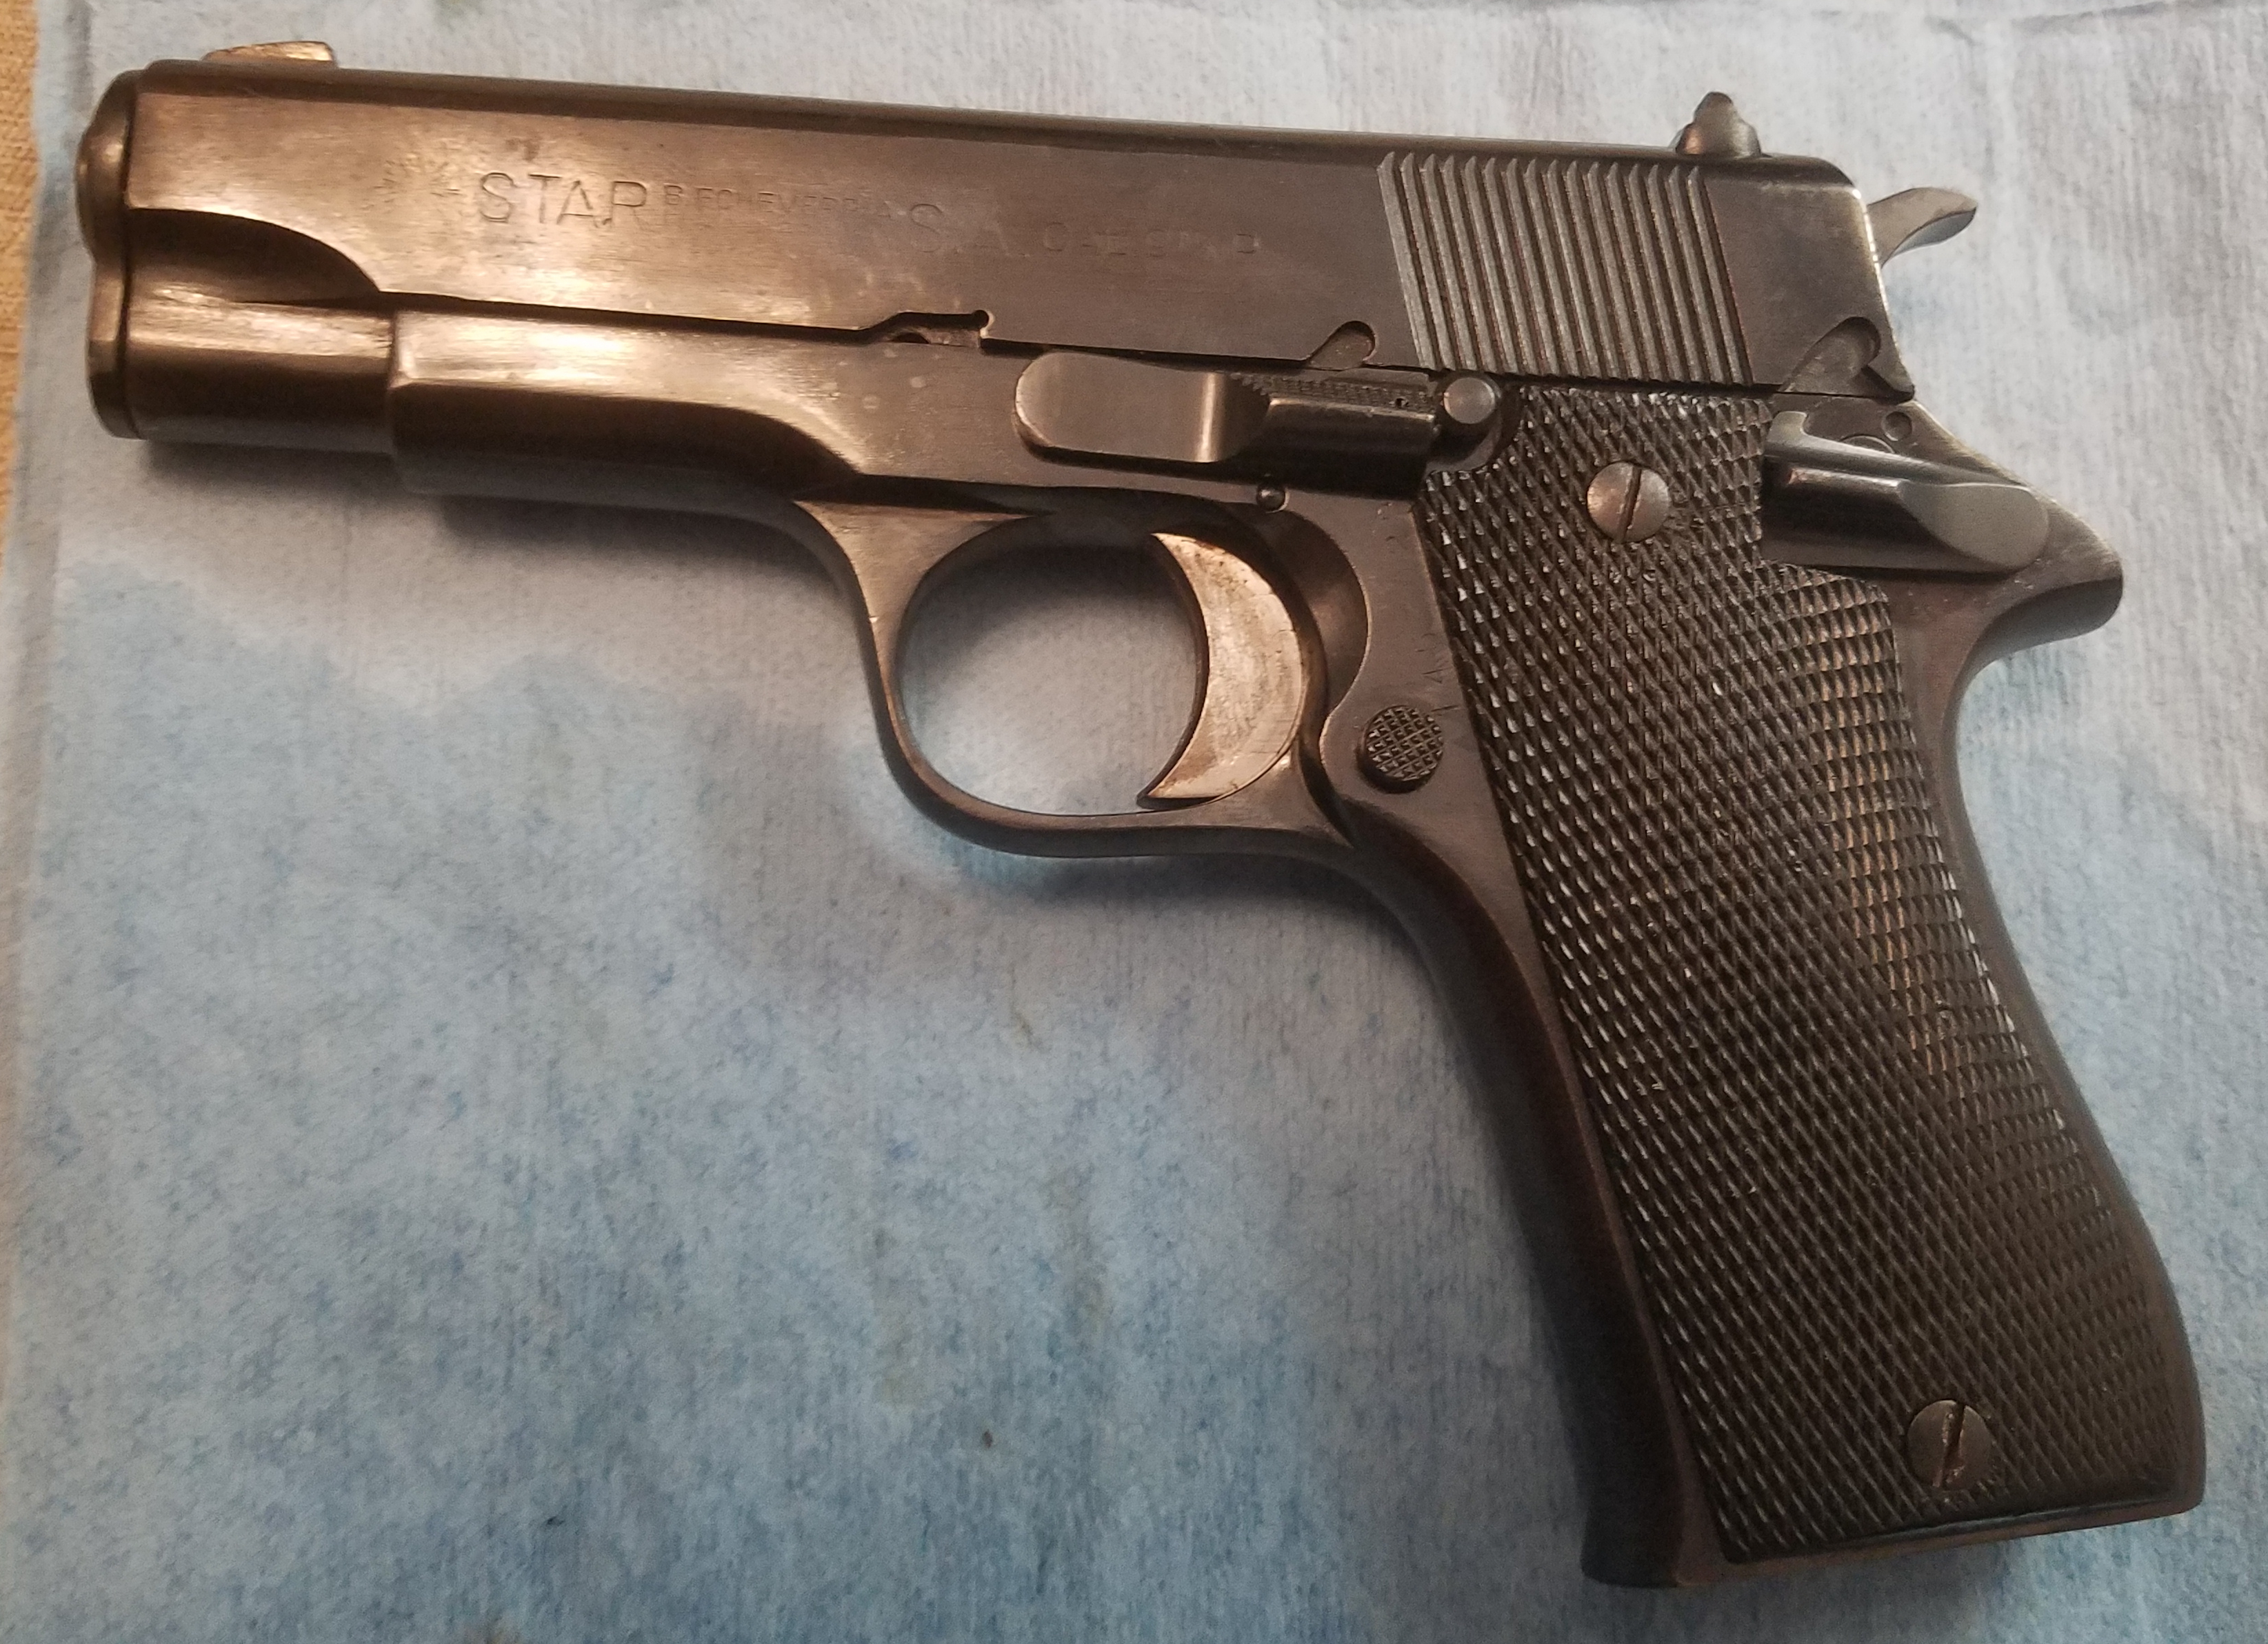
Speaking of stars, here's my brother's Star BM. Fun fact about this pistol; it's
Spanish police surplus, and back in the 80s and 90s, movies that wanted to have
M1911s and didn't want to spend a lot on them just used these, because they look
pretty similar.
Again, I disassembled the gun as far as I felt I reasonably could, boiled and carded
twice, then soaked in kerosene. There was no pitting on this one, but there were
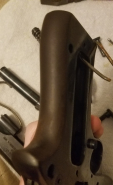
more spots where the finish had been removed. For some reason the barrel, on the top
of the chamber(which shows through the ejection port), had all of the finish taken
off of it. I'm not sure whether or not this was something that was done to make it
look "cooler", but I decided to put some cold blue on it(which you can see in the
last image). The rest of the barrel was blued, so I saw no reason that this area
shouldn't be, and it's not like there were clean lines between the blue and the
white.
Both of these came out very well, and it was very rewarding to see the final result.
It's crazy to think that some "gunsmiths" will take a full on wire wheel to guns
when this is what a pot of water can do!
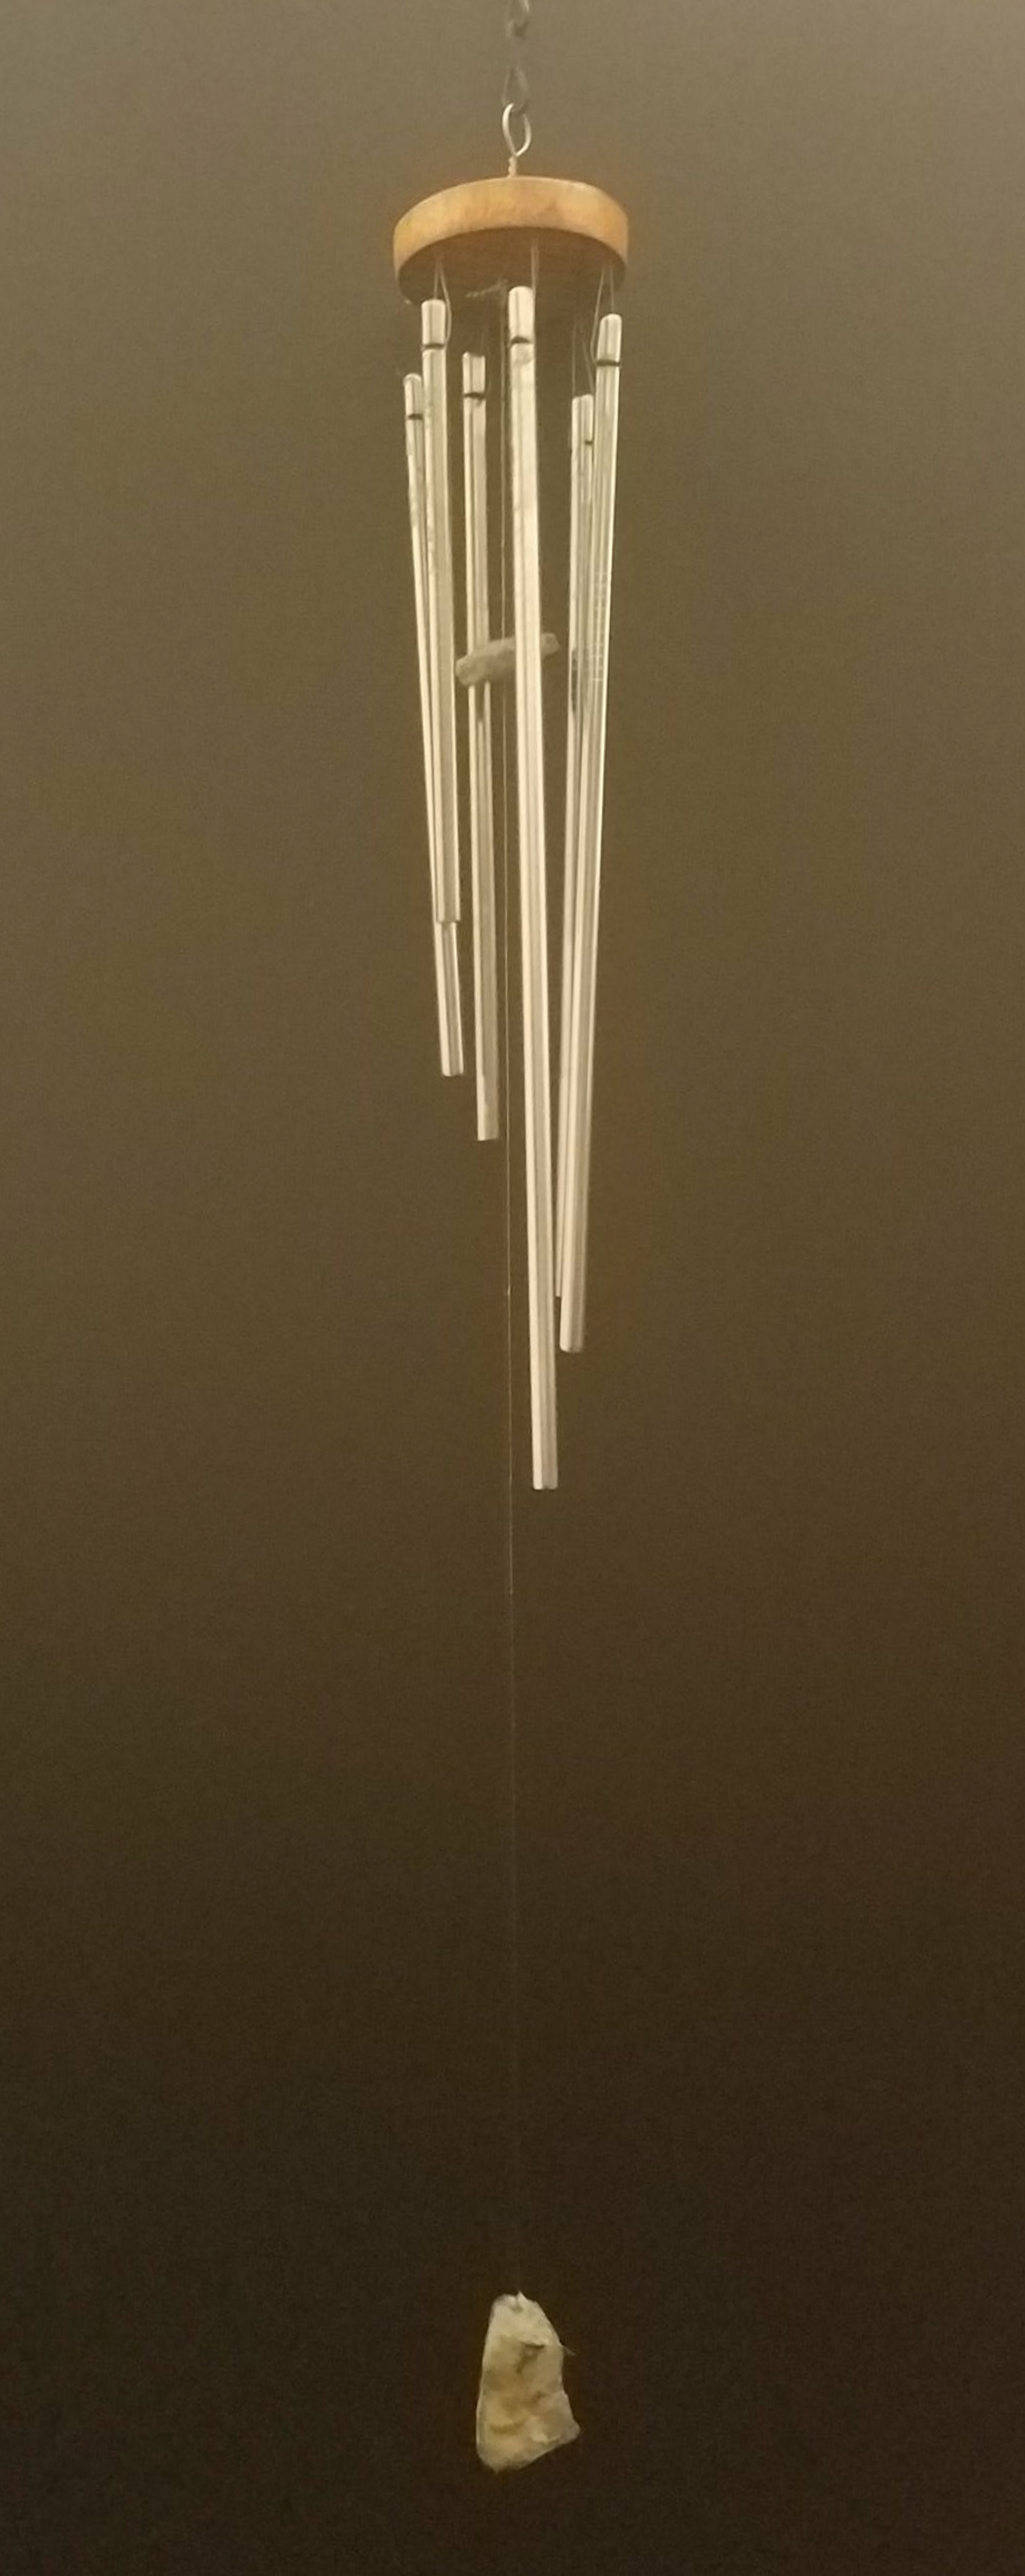
windchimes for mom
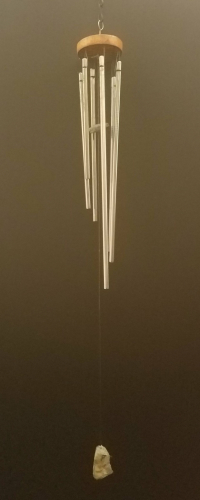
This project really starts with some rocks. I was looking around in my container
which I store rocks in and I found a few rocks which I though would look good as the
parts of the windchime. I also got a few out to practice drilling rocks with my new
Amazon 1.5mm diamond-coated drill bits, which I put in my dremel with some
electrical tape to fill the space in the collet. The test rocks came out good, and
after some deliberation, I drilled the dinger(?) part and the hanger(??) parts so
that they would accept monofiliment cord.
The windchimes are made of stainless steel straws, 6 in total. I used a dremel with
the cutoff disc to cut them to size. Two of the straws are uncut, one which is 10
inches and another which is 9 inches; the other ones step down in 1 inch increments.
After they were cut to size, I deburred the inside and filed the outside so it's not
as sharp. Then, I used the cutoff disc again to cut holes which more monofiliment
cord would be threaded through. I messed up while doing this, making one side of
holes higher than the other, but they seem to sit OK on the cord nonetheless.
The base(?) is made of a small section of large dowel that I cut off with no
particular size in mind. I used a drill with a small drill bit to drill the middle
hole(it came out off-axis but that's fine) and then used some visual calculus to
drill the other 6 holes. I never tried to get any of it exact. After the holes were
drilled, I cut one of the cleaning rods that came with the straws off so that the
hoop at the end could serve as an attachment point. I ended up having to do that
again, though, because I got wood finish and polyurethane all over it when finishing
the base. I used one coat of finish and three coats of polyurethane, not sanding.
Screw sanding. The wood sucked up most of it anyways.
I assembled the rocks first, threading the cord through the dinger, then tying it on
the hanger, tied on the other side to the attachment point, which I bent 90 degrees
at the end so it wouldn't come off and could hold the cord. I then took it off to
finish the base. After the base was done, I took the straws and threaded the cord
through a hole from the top, then into the straw, and finally going back out to the
top, and the cord being stretched to the other hole, where the process repeated.
When I was done, I tied both sides around the shaft of the attachment dongle, tied
them around it, and superglued them in place. I also tied around and superglued the
hanger/dinger cord where the shaft bent 90 degrees.
In all, I'm very happy with how it came out. The chimes sound great when hitting
each other, as well as the dinger. I hope my mom appreciates it.
Edit after Christmas: I put the chimes in a little makeup bag I got for here off
of Amazon, and she was very surprised and happy to open it up and see the chimes.